Tuesday, January 25, 2011

Say what?!


Except for the chocolate chips, this cookie is completely sugar-free, and gluten-free. And guess what?! It's yummy! Now don't get me wrong- I wouldn't suggest this if you CAN have normal flour...cause those cookies are DEFINITELY yummier. But seriously- BEST gluten-free, sugar-free treat I've ever tasted! Ummmm not to mention there's good grains in there like sorghum and millet! Go to my Chef Danielle blog for the recipe!

Eventually I want to try phasing out the chocolate chips and getting more towards unsweetened chocolate. Meh...we'll get there someday.

Practically sugar free, definitely gluten free, chocolate chip cookie

I have tried many MANY gluten free, sugar free cookies where all the comments say it's amazing, better than normal cookies. I try them, and they taste like CRAPOLA! Well, I finally tried and tweeked a recipe I found and came up with this! It is VERY tasty! Now I must leave a disclaimer- I probably still wouldn't make these for guests who have normal cookies all the time. But for a person with a gluten-free, sugar-free diet, these are just scrumptious!


The only sugar in this recipe is from the chocolate chips- the rest is completely sugar-free and gluten-free!

Ingredients:

1 and 1/2 Cups Agave Nectar
3 Cups my preferred gluten-free blend
1 1/2 tsp xanthan gum
1/2 Cup Butter (1 stick)
2 Eggs
1 tsp. Vanilla Extract
1/4 tsp. Salt
1 tsp. Baking Soda
1 tsp. Baking Powder
1 pkg. Chocolate Chips

Directions:

Preheat the oven to 375. In a large mixing bowl, combine butter with Agave and mix well with a hand mixer. When combined, add in the eggs, one at a time. Add in the vanilla and mix well.

In separate bowl, mix in the baking soda, flour, and salt. Add the flour mixture to the liquid mixture, one cup at a time, and mix well. Stir in the chocolate chips until combined.

With a cookie scoop or a tablespoon, scoop out the cookies onto a cookie sheet, leaving them about 2 inches apart in all directions. Bake until golden, about 10-12 minutes.

My favorite gluten-free blend

My brother, Jacob, is a health nut. He has experimented a TON with gluten-free flours and found this blend to be the best. After my experimentation, I agree!

3 cups sorghum flour
1 cup millet flour
1 1/3 cup potato starch
2/3 cup tapioca starch

Sift together all ingredients until well blended. Store in an airtight container in the refrigerator or freezer.

For the most part you can substitute this in any recipe and add 1/2 tsp of xanthan gum per cup of flour.

Saturday, January 22, 2011

Saturday...

Well, like most Saturdays lately, I am on the computer...Dante is laying by me....Clay is sleeping. He really does sleep most of the day Saturday, and half the day Sunday. Weekends are his recoup time.

I woke up with an extreme hunger for German Pancakes. So I thought, hey- why not experiment with a gluten-free flour mix, milk substitutions, and give it a shot? It's in the oven right now...so, we'll see:) I'm not holding my breath.

Work is crazy busy (i'm a tax preparer), Clay's work happens to be crazy busy too, and Clay is simply hangin on by a thread. It's hard.

However, I don't know if it's cause I haven't had Lyme Disease as long as Clay, or what- but I simply am not herxing! I am REALLY tired- like all the time tired. And my mouth tastes bad. But other than that, I'm basically the same ol me. Thank goodness! It enables me try and take care of the hubster.

The most happy thing is happening this next week though- my mom is coming to visit! YES! I seriously am so stinking excited. She is going to help me make freezer meals so that I don't have to cook so much and think of things to make. I can't tell you how much this means to me. Life will be so much easier! And of course, I just plain can't wait to see my mom! AND get her all to myself! That never happens anymore! The last few times she's visited was when Rebecca was here, so she had to divy up time between us and the grandkids...whenever i visit Oregon, I obviously see my sibs too! (which I loveeee) but it makes it so I don't ever get REAL quality one-on-one time with my mom. So this will be great!

I think it's time I start decorating my walls. I have really been into furniture, pillows, curtains...that kinda thing. But my walls are seriously bare! I need to get on that cause I think it'll just feel better.

I seriously watch a bazillion tv shows I've realized. And it's crazy cause I cut out 2 of my fav's a few months ago (Grey's and Private Practice) but somehow that time has been filled. We've got Bachelor, Parenthood, Glee (which might be cut...they are kinda getting boring and lame), American Idol, Modern Family, Off the Map (I know i know...it's that new one that is similar to those two shows I cut? Whatever), the office, aaaaaand I THINK that's it. ha! Seriously- a lot of shows. Oh well. Btw- I am loving the new judging panel on american idol!!! I think it's a good change. Except I don't like it when Steven Tyler hits on young girls....or any of the girls for that matter- it's kinda awkward.

Aight- I'm out. Sorry if this was boring and lame (like glee:) ). It really does seem like my whole life revolves around tv and lyme disease. Sad, but true. I'll try to have some more uplifting cool things to share next time!

PS- The "german pancakes" just got done. They didn't turn out. Surprise...surprise...

Saturday, January 15, 2011

Lace flower pillow


Here's another pillow I made for my cute little blue chair. I LOVE it. It's got a vintagey feel to it...but at the same time modern. I don't know why but so many projects I keep thinking LACE! I love it. I think it's so precious. Just thought I'd share!
Posted by Picasa

Wednesday, January 12, 2011

It's an abusive relationship


Does anyone else have an extremely one sided relationship with Joanns? Sure, you get their products, but really....REALLY- don't you think they could give you a smile, a note of intelligence, a titch of service...EVER?!

Here's what happened.

I go to Joanns, and ask, "Where is your seam binding?" (we are currently on the thread aisle)

"Just on the other side of this"

So of course I go to the other side of the thread and there are of course, two sides to the aisle, not to mention A BAZILLION things. I've never bought seam binding before so I have no idea what it looks like.

"So is it like...on this side? Or what? I don't know what it looks like..."

"Yeah it's over there- it will say seam binding"

THANKS! NO FREAKING DUH.

"Well, do you know what general area it would be at?"

"It will just be in there with them all you just have to look"

Oh? Look? I was trying to listen for it.

FINALLY she comes over and says, "What are you using it for?"

"A knit shirt"

"A knit shirt?!?! Are you sure?! That doesn't seem right"

"That's what the pattern calls for"

She beeps on her headseat "Hey, what is seam binding?" (and of course I'm sure you're thinking like me...how could it not seem right to her if she didn't even know what it freaking was?) Then she turns to me and says, "Well since we are closing the store and opening in a new location, we are just going through all these really fast"

"So...do you know where it's at?"

"Well all of these here are just selling really fast and we aren't getting any in"

"So...are there any left?" Since she has YET to show me where the freaking thing would be.

"No- they are all gone."

"Okay." Then she sits there for five minutes telling me how seam binding shouldn't go on a knit shirt.

I wish this was all.

I go to the register to buy some Christmas Decor. I have a gift card which LAST time I was there they said either I needed to bring the receipt in or they could call a number and get it working...cause it wasn't activated or something. Well- she runs it (same woman) and it doesn't work. I tell her "Last time I came they said it wasn't activated or something and that they could call a number to get it working". She says, "No they are all activated" and continues trying to run it like 5 more times! Then she slides it to me and says, well it doesn't work. And I'm like...."So can you call that number?" and she is like, "Yeah you call that number and they'll take care of it." And I'm like..."So YOU'RE not going to call?" She says, "No that's the customers job. It's your responsibility"

OH MY FREAKING HECK. I was bursting at the seams.

Like I said, an abusive relationship. And this is just like 2 Joann stories out of a bajillion in my life. GAH.

I don't get it cause I've been to stores where they say, "Aisle 7 middle of the aisle...about...mmm...probably 1/4 way down from the top" and BAM it's there! Why can't everyone do that? Instead of the lovely..."over there"..."you have to look"

JoAnns. Love you. Hate you. Can't live with you. Can't live without you. Don't worry, I'll be back.

Monday, January 10, 2011

Bachelor Week 2 Highlights

WOW Just a few points I need to make:

1. Brad Womack just may be my favorite bachelor. WHY? Cause he sent home the crazy pants! Right off the bat! He saw drama, and sent it packin. Why don't they all do this?!?!?! MELISSA WAS CaRAZY! wowsa. Did anyone else feel sooooo awkward when she had alone time with Brad and was like crying then laughing and then randomly said, "Sorry my breath smells like onions...I ate 4 pieces of pizza" and giggles. Yikes! Did she remind you of Michelle? From Jake's season?
GAH!

2. Speaking of michelles, MICHELLE IS THE MOST ANNOYING WOMAN EVERRRRRRRRRR.
K- we know you're gorgeous, we know you want Brad, and guess what else? We KNOW IT'S YOUR BIRTHDAY- FOR THE MILLIONTH TIME! You know what I hate? When girls act like they are picked on cause they are on a group date. Hello? Haven't you seen the bachelor? Don't you understand you will be on group dates? It's part of the deal. GET. OVER. IT.

3. Emily reminds me of barbie, and a robot, and the girl from win a date with tad hamilton. And the Orbit Gum girl. She just has that perfect look. As in- she was digitally made. You know? Unreal. It makes me mad.

4. Ashley H was sooo super cute. I liked her a lot. Their date seemed good and from the previews I think she's goin far!

5. Hmmmm....still don't know what to think about this one.

Are we gonna learn more about the fangs? And did it seem like to you that when brad wasn't around, she didn't have them on? And when he was around, she did? Who knows...

6. GOSH- TALK ABOUT BOOBS. I'm pretty glad Clay hasn't been watching this season with me cause I swear...all of them let their boobies hang out all over the place. It's like- hello?! Do you not have anything else going for you so you have to shove your boobs down his throat?

Well- excited for next week.

Started my pills. Wanna know how I feel? My mouth tastes BAAAAAAAAAAD. As in disgusting...all. the. time. Toxic. Which then makes me feel kinda icky. If I chew gum, I'm really not too shabby. Seriously- hate it. But if this is the worst it gets that's just fine! I AM only 3 days into the pills though:) We'll see how it keeps goin. OH YEAH- today I got 30 viles of blood drawn- and before we were done...she had to switch arms cause my first arm like...ran out of blood or somethin! Kinda crazy.

Aight- that's it for now. Peace OUT.

Saturday, January 8, 2011

Chicken Pecan Cheese Salad

This salad is TO DIE FOR! My sister Amy gave me the recipe and let me tell you- I ate this three days in a row! It's soooo easy, sooo quick, and sooo tasty. Definitely one for the guests!


In and OUT

Yesterday morn we woke at about 4:30 am....flew out of Idaho Falls at 6:00am...were at the doctors from 11am-2:30pm...flew out of Seattle at 6:00pm...got home about 11:00pm. I think my favorite part of the whole flying experience was when I opened that little air blower above my head on the plane...and Clay turned to me and said, "You realize you're just breathing in fresh farts right?" My husband is such a charmer :)

My ankles hurt. I'm serious. I have been hobbling around all morning! I think it's from the hustle and bustle to each terminal. We flew 4 airplanes yesterday...

So here's the scoop-

Clay appears to be on the right track! His bloodwork keeps coming back good- meaning his liver/kidneys are in great shape...which is great news considering how many antibiotics are going into his body at once. The doc said, "I wish all my pateints had your liver levels" or something like that.

The doc thinks she has finally grasped what works for Clay's body since he had such a ginormous herx a few weeks ago. She put it like this "First we start with sticks and stones, then we move to guns, then we nuke em"...she emphasized this was an ANALOGY. teeheh. But basically she is like...alrghty, time to turn it up a notch! She explained that when he has bad herx's like that, his body is emptying a TON OF CRAPOLA. So that's good! And sucky.

I got a few answers to things that have been bothering me lately. For instance- the past year or so I have been grinding my teeth like MAD. The doc explained to me that this is classic bartonella (which is a co-infection that runs with Lyme disease- thats what causes the joints to hurt)...who knew?!

Another funny thing- Bad circulation can occur with lyme/bartonella (i kinda confuse which causes which sometimes) Clay always says his hands are SO COLD. I believed him, but was always confused. His hands NEVER felt cold to me. Well, when she was doing physical exams on me....she felt my hands and was like- woah! Cold hands! Are they always this cold? And I'm like...uhh I never noticed! They don't feel cold! And she said- well do my hands feel warm? And I said- yeah actually they do! And then it clicked. No wonder Clay's hands never feel cold! Mine are just like them! Does anyone else think of Edward and Bella when I talk about this? I did too.

I am going to go fill my prescriptions and start getting treated TODAY. Here are some general estimated answers she had for us regarding some things:

She thinks I will be cured within a year. YES! My new years goal will hopefully come true!

She thinks that we shouldn't consider having a baby for at least 2 years...because she thinks that's when she'll have Clay UNDER CONTROL. Not cured, but under control. The thing is, I was just telling Clay the other day that 2 years sounded about right to wait. Pretty sucky, but that's okay. I'm glad to have a general plan. She says that as long as I'm on baby-safe antibiotics throughout my pregnancy, the baby shouldn't get lyme disease. She says she deals with this in her office ALL the time. I'm so grateful we found who we did when we did.

There were a lot of other random things too, but all probably too jargony and lyme detailed for the general public :) haha. Those are the highlights.

OH YEAH- one more thing. This was great news! She wants to see us in one month, for one last time...then we can start going every other month! We will still have phone consults in the off months, but this will make it SO much less stressful, and wallet-friendly to only travel every other month. Yay for us!

Well...I had a list of things I wanted to get done today, but I just don't know that they'll get done. It might just have to be a rest day! I'm so grateful for Walgreen's drive-through pharmacy. I don't even have to get out of my pj's and no one will ever know! ('cept you guys)

Here's to the new year. It really is gonna be a good one. I can feel it. Great things are in store! You just wait!

Wednesday, January 5, 2011

Jewlery Boards Tutorial

Ever find a tacky/cool mirror like these?

I got the oval one from the DI for $15, and the curvy one from another thrift store for $25.

Well, I'm going to show you how to turn those....into THESE!


I made these jewelery boards for my two sister-in-laws for Christmas and they loved em! Just a warning....I started out taking pictures of each of them throughout the process...but that got tiring so I figured I could teach you taking pictures of just one! So....they transfer from two to one...but I used the same process on both! And I noticed I didn't take pics of a few of the steps...but I think it's pretty self explanatory.

So here we go:

1. Find a cool frame/mirror.


2. Take off the back and the mirror. I used the prongs of a hammer, and a flat head screw driver, to get staples out and screws out.
3. Kilz frames. Use Kilz Spray paint- I've found things look more store bought when you spray paint vs. brush paint...just my experience though!

4. Spray paint frames. For some reason I didn't take a pic...but if you don't know how to spray paint....read the can :) If you want to glaze it, wait till the spray paint is dry. Then I suggest following allthingsthrifty.blogspot.com 's instructions on glazing! It's super duper easy.

5. Get a board. I found this board in my garage! Score. Don't know where it came from, but it worked! Trace around the mirror onto the board.
6. Get a jigsaw, and saw around the shape! I did this all on my own! I was so proud of myself!!!
And no, it's not mandatory that you wear a paintballing mask while doing it...I am just protective of my eyes!!! And that was the only protective thing I could find in the garage:)

7. Sand edges a titch so that they don't hurt you during the rest of the process :)

8. Put fabric face down, then put the board ontop of the fabric. Pull fabric as tight as you can and tape it!
9. Use a hot glue gun to glue the fabric in place. I found that the tape wasn't the strongest of holds...so I took one piece of tape off, then glued (pulling as tight as can be!). I would suggest STILL taping it first, cause it places it in the general spot you want it...it just makes it easier.
I know this pic doesn't do much for ya...but it's kinda hard to glue gun and take a pic at the same time. But just glue gun within an inch from the edge and you'll get the tightest look. Which you want. Trim excess fabric from back.

11. Place frame ontop of board, and then place hooks where you think you want them...then snip TINY snips with TINY scissors where you want hooks. If you're putting in a headband holder, here is the time to make it.
a) Cut ribbon length of frame + 4 inches.
b) Cut another piece of ribbon that is smaller same length
c) Place smaller ribbon ontop of bigger ribbon and sew little slots for headbands. I made mine various sizes. Make sure you backstitch when you begin and end! These slots will see a lot of action so you want them to be able to hold up through time.
d) Glue gun them to the spot you want them! Make sure you leave enough space at the bottom or side for the headbands to sit...you know, so they aren't squooshed against the frame?

12. Screw hooks in and make your fingers really tired! (My right pointer finger still has a callous from this process...and it's been like 2 weeks!) Note- my hooks stuck out a titch in the back...this was really okay! Cause I still had to put the back of the frame on...so they were covered! As long as they don't stick out A TON- you're okay.

13. Put the back of the frame on however it was put on originally. One of the frames I screwed screws in, the other one I staple gunned.

14. LOVE IT!


Seriously- this was soooo fun and so rewarding. The girls loved em and I really need to make one for myself now!


Monday, January 3, 2011

Target Flower Pillow Tutorial

Have any of you seen this pillow from target?
It's soooo cute, right? Well, I decided I wanted it. Not in yellow, and not by paying $30ish dollars. Soooooooo I made one meself!

Here goes.

1. Cut out two squares. I did the back of my pillow in a pattern, similar to the target one. These are 17" x 17" squares.

2. Fold the plain square in half one way, and in half the other way. Mark with a pin on all the folds (center, side, top).

3. Find a circle that is around 3 1/2" in diameter. If it's a little bigger that's just fine! I wouldn't go smaller though.

4. Trace around the circle 9 times. I just eyeballed the right spots based on the pin marks. I'm SURE someone can figure out a more calculated way to do this...I just didn't feel like it!

5. Make a strip that is 5/8" thick. This does not have to be real special...as in lined up with the selvage or whatever. I seriously took old random fabric and took the longest edge, and folded it over...lined the fold on 5/8" mark on the sewing machine, and sewed! It was VERY sloppy...but this project really doesn't need precision (at least for the flower parts)! This strip should be approximately 50" long.

6. Turn strip right side out. This part proved to be VERY TRICKY for me...until I realized...HELLO GENIUS! Do this! So I tried to picture it...but it's difficult. Basically, put a long safety pin through the top...about 1/2" down.

Then...slyly turn the pin upside down!

After you do that you can just push it through and pull. Good luck. It's still a little difficult with such a small width.
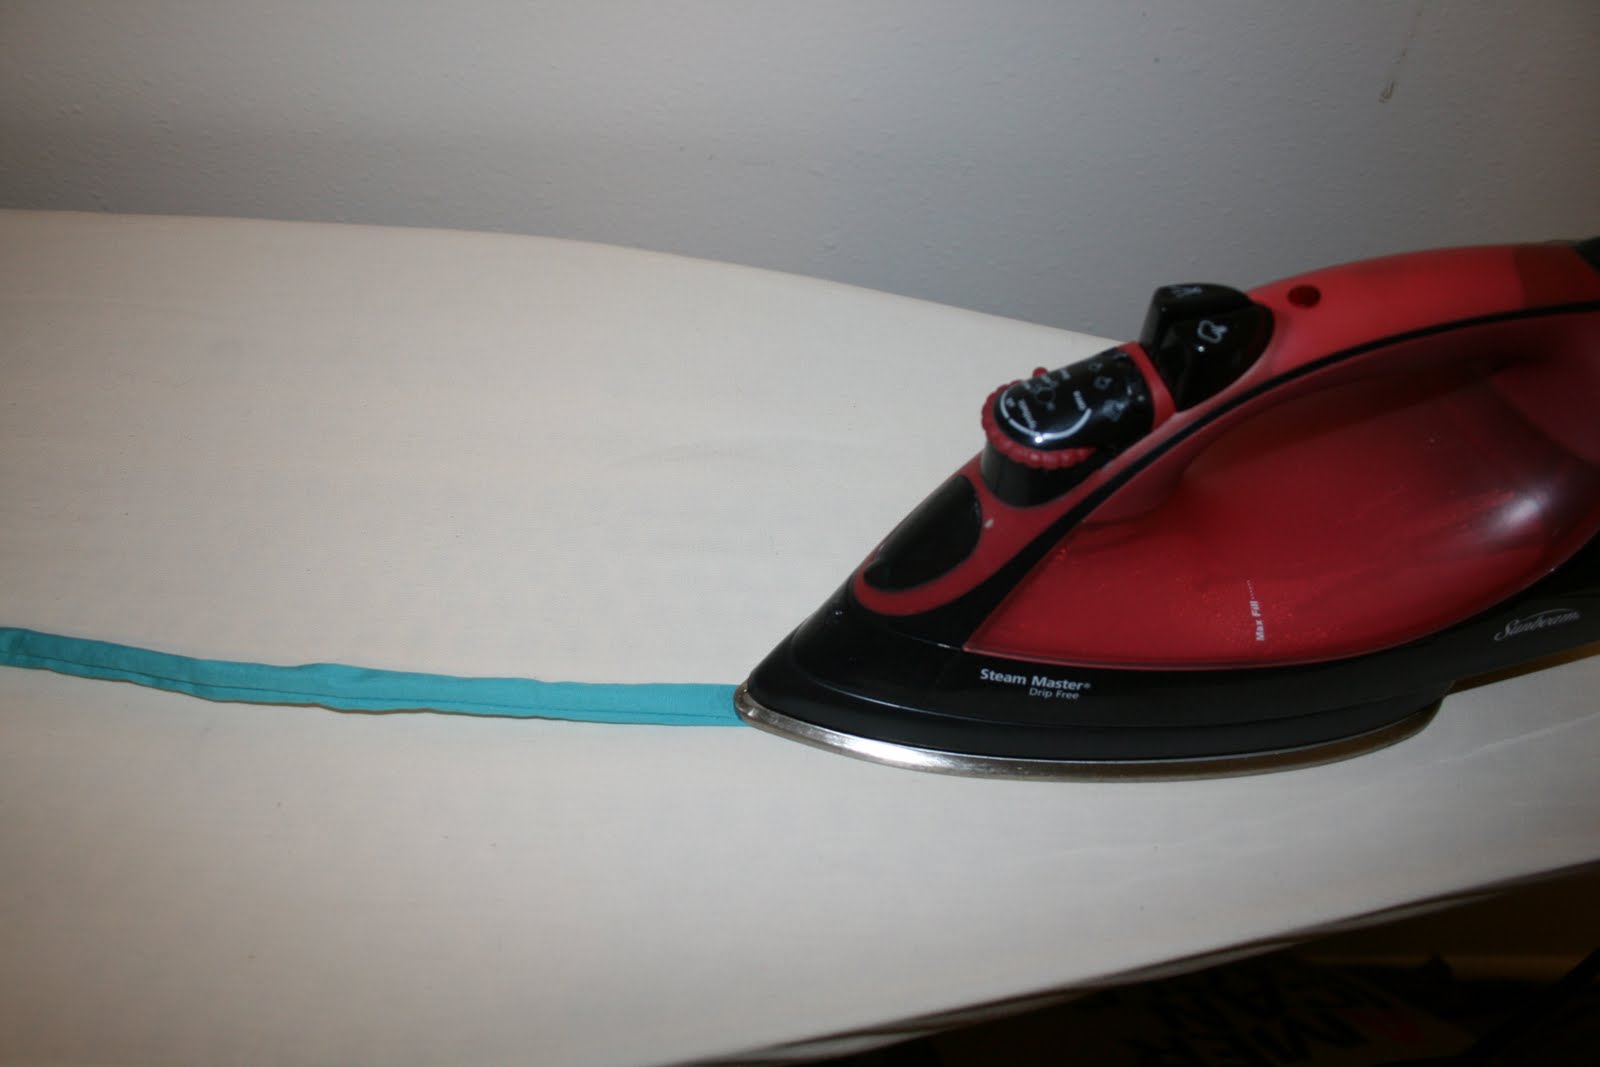
7. Iron strip flat.

BTW- This part doesn't need to be perfect either! The seam can be all over the place if it tries to do so...mine did a lot and I just let it. As long as the strip is flat, we are good to go!

8. SEW THE STRIP ON! And make it into a pretty flower! This takes a few pointers.
First of all, when you start, fold the raw edge over, so that it is hidden and looks nice and clean. You basically want to put the left edge of the strip, a little over the circles line. As you are sewing, you will come to a curve and this will seem really awkward....
You're thinking...wait a titch...how the heck do i sew this flat? WELP, ya don't! This is how they make those little flowers so cute! You fold it over. Like so...
You see? Instead of bunching it, you fold it flat. Then you just sew right over that, and continue folding everytime you're put in a situation like that where you feel like you're having to bunch it at a curve.
You see?

So continue doing that. All around the circle. I suggest overlapping the rows like half way. Meaning when you move onto another row (moving towards the inside of the flower) overlap halfway over the last row you sewed. Eventually you'll get to the middle...
This part can be confusing too...how do you make that perfect middle? Here's the catch...it's really easy! But kinda hard to take pictures of. I'll try my best to guide you through it.

First, twist the tail a bit.
Next, swirl it around the presser foot/needle (make sure your needle is down at this point and pressure foot is up). Fold under the raw edge and just kind of bunch it in with your swirl. It may look funny, but it really does turn out just fine.
Put your pressure foot down and sew a triangleish type shape ontop of the outer swirl. Then continue your triangleish shapes inward towards the center. Backstitch and your done!
See? It looks a little messy, but personally I think it fits perfectly with the look. If you want you can spend the time to go around the swirl perfectly... but I think this looks just great! And it's quick!

9. Iron the flower.

This is actually really important. It just solidifies everything and makes it look professional.

10. Continue the flowers until you have completed all nine. This actually takes a LONG TIME! Don't get discouraged! The finished product is WORTH the time.

11. PIPING! First, cut strips about 2-3" thick. This all kind of depends on how thick your piping is...just make sure you have 1/2" excess on each side when you wrap the fabric around the piping. If you have to piece together the strips like I did, make 45 degree angles (I think that's right? teehe) on the edges.

Then you place them like this.
NOTE: this pictures i kinda deceptive. I cut one strip bigger than another strip...they should all be the same width. After I sewed the seam there, I trimmed the wider strip down to the smaller one. I only sewed the length of the smaller one....Make sense? Sorry!

Sew them together and press. This way when you wrap the strip around the piping, it will look like this:
This is better than just sewing two normal pieces together because it makes it so it's not so thick in one spot.

Next, use your normal pressure foot still...wrap the strip around the piping and pin it, and sew along the edge. This just makes it easier when you are sewing it on the actual pillow.

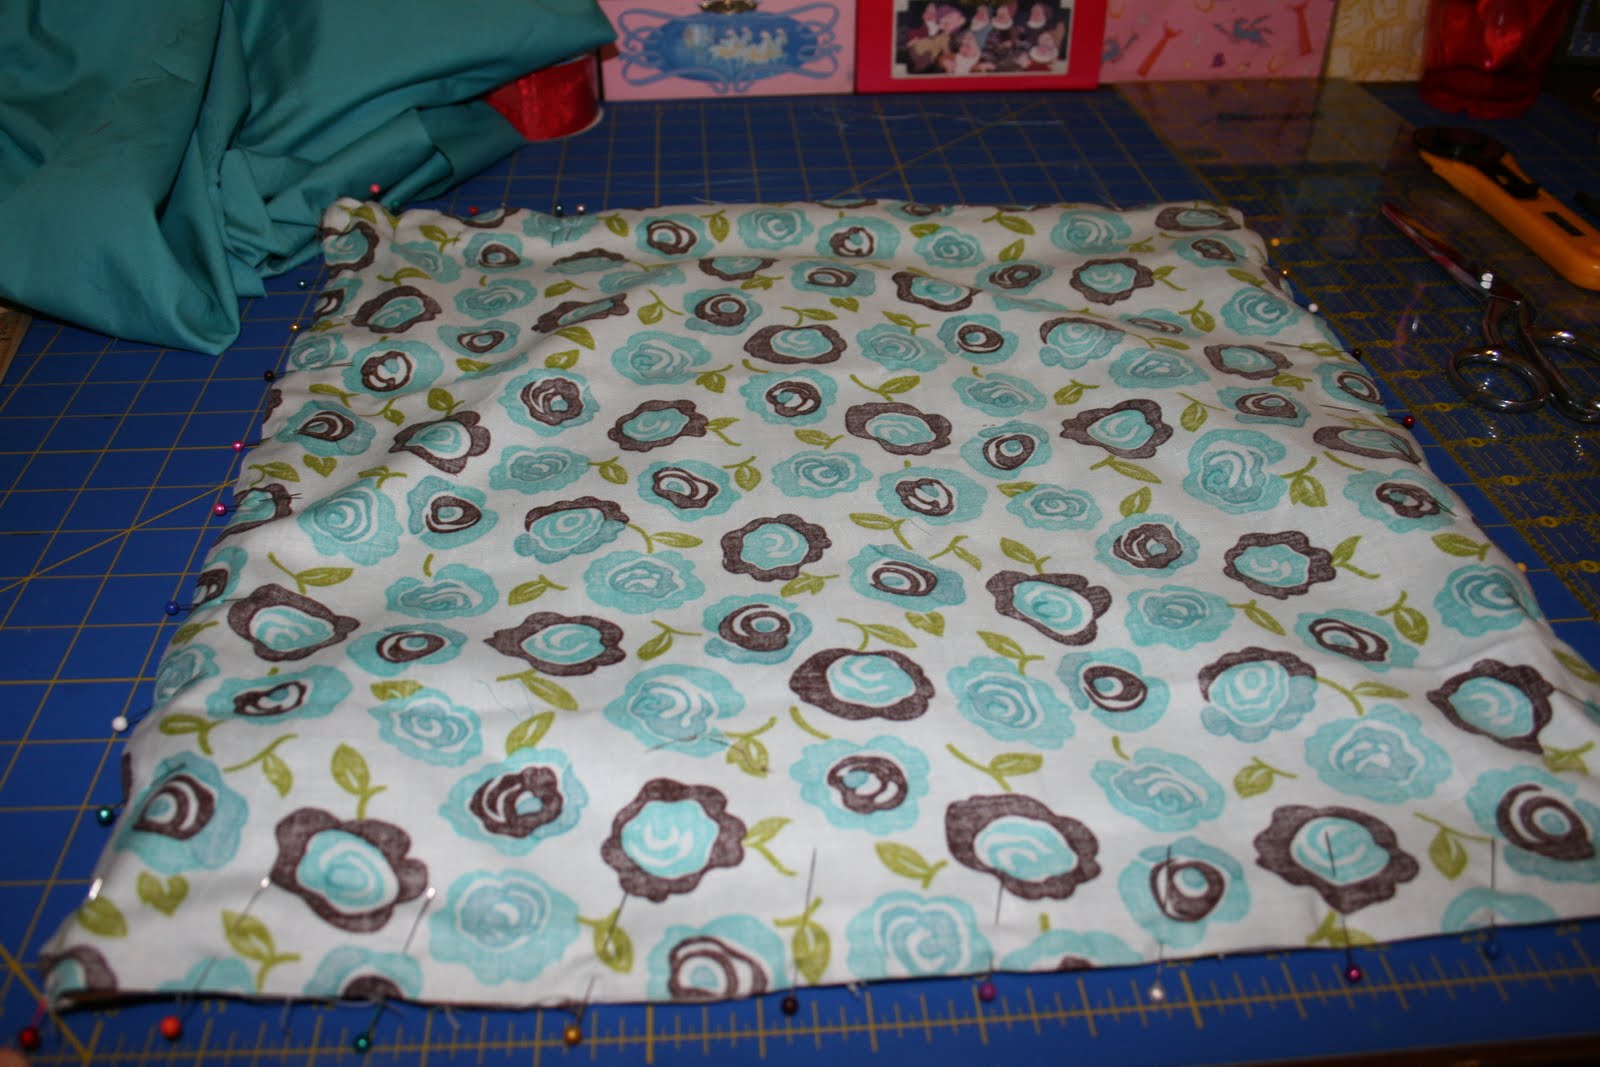
Next, pin piping all around the flower square. Make sure you put raw edges together.
When you get to the ends of the piping, unpick the seam a bit so that you can fold under the fabric. Cut piping inside so that it fits together properly, and you can put the folded edge ontop of the other raw edge. See?
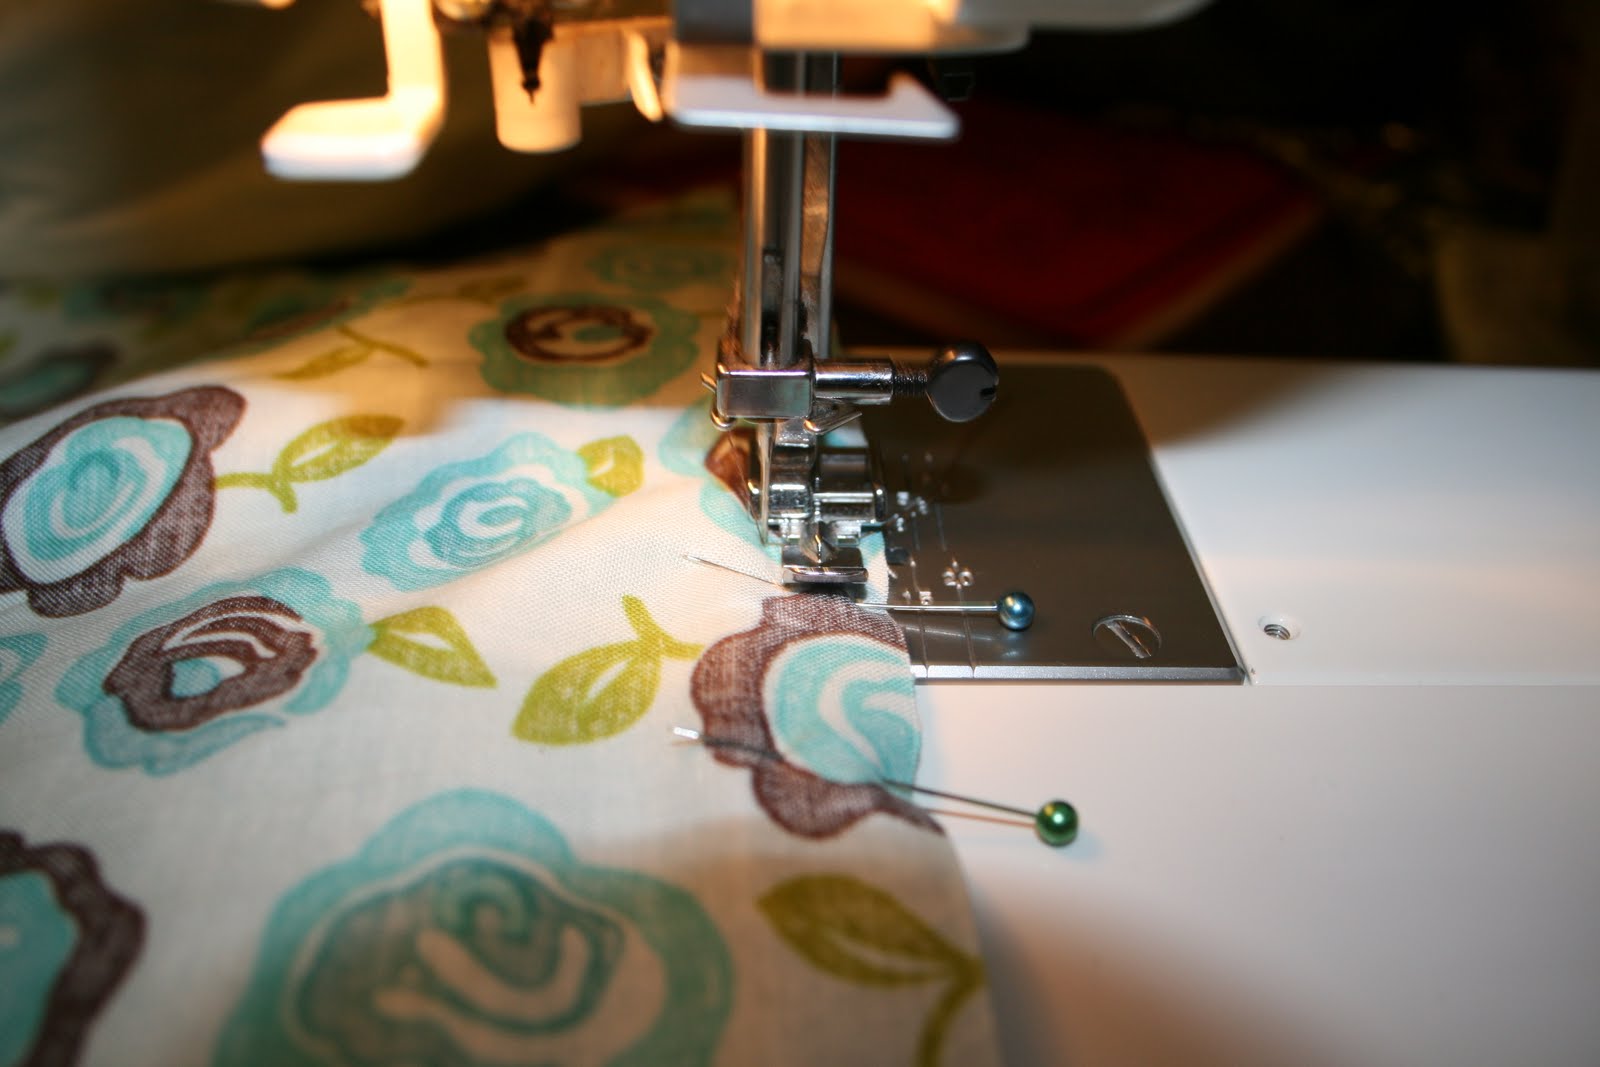
Now, use your normal pressure foot still, and sew around the pillow.

Next, pin right sides of pillow squares together.

NOW, use your zipper foot. Feel with your fingers the piping and sew as close as you can to it. You can move your needle far to the left for this.
TIP- I have found that when doing corners, it turns out better if you sew a little bit on the piping itself. I don't know why...I think if you DON'T do this, it always is too loose (for me anyway).

Make sure you leave an opening to turn right side out!

Turn right side out (poke corners out), and stuff with stuffing. I used batting from an old pillow I didn't like.
Pin shut.
Now the best way to do this would be to hand stitch this closed. However....I just sewed it with my machine. It isn't the prettiest that way, but it works and you really wont ever see it unless examining it!

And whala!

A mock target pillow for my polka dot chair, that I love SO MUCH! Good luck! Comment with a link to yours if you make one! :)

Blogger's Pillow Party
I entered my pillow in the Blogger's Pillow Party! Hope I win cause the prize is pretty pretty fabric :)