Friday, November 10, 2006

Our Lyme Story


What to know what Lyme is? Go to my Lyme Disease and Ticks FAQ page. 

Our Lyme story really starts with Clay, my husband. He remembers feeling symptoms as early as 16 or 17 when in track. His hips and ankles would get stiff and sometimes swell up, but being young...he figured that maybe that kind of thing happened to everyone. Especially after he went to the doctor and they just told him to ice and rest and he'd be better. Well, it wasn't too big of a deal back then, it only happened every once in a while. So, no biggie.

Fast forward to age 19, Clay goes on a mission for our church to Brazil. He had to walk a LOT and pretty soon his symptoms were flaring up bad. His joints were in constant pain and he eventually came home because of it. He went to multiple doctors (the best in the area) who all said they couldn't figure out what was wrong. They could see there was inflammation, but couldn't see a cause.

Clay then went to BYU-Idaho, where he met pretty ol' me :). He was seeing a rheumatoid arthritis specialist who was pumping him full of steroids, antibiotics, pain medications, and really had given up on trying to find a diagnosis. When I met Clay, I soon realized he had something 'wrong' with him, but didn't know the extent. He had a handicap pass on his car, so that brought up everything. Also, he kinda walked like an old man :). After a while it became apparent how in pain he was. I remember telling my mom he'd probably end up in a wheel chair within a few years, but I didn't care. I loved him! So we got married.

I started going to the doctor with him and realized that the guy was a crock. He would never listen to us, didn't care what Clay thought or felt, just wanted to get us in and out and take our money. We kind of just accepted the fact that Clay had chronic pain that would just never go away. Until it got worse. And worse. And worse.

One day Clay got an ulcer that was causing him so much pain. He wasn't going to church very often because he was sick so often. Our home teachers (a couple men from our church that come and check in on us... make sure we are doing okay and stuff) came and gave him a priesthood blessing, and I remember distinctly that in the blessing he didn't bless Clay that he would feel better, but that doctors would know what to do and we would find answers. Within a couple hours of getting the blessing, Clay's old mission president called him. Keep in mind Clay had been home from his mission for over 2 years. He asked Clay how he was feeling and Clay told him not too well, and the mission president asked him if he had been tested for Lyme Disease. Clay said he was sure he probably had, but he'd look into it. That night Clay looked up Lyme disease and was like, WOAH! hold up- this is so me! All the symptoms aligned and he was sure he had it. The next day he called past doctors and found that NO ONE had tested him for Lyme disease! We all fasted as a family and he went and got tested, and we just KNEW he had to have Lyme disease. However, the test came back negative. We were ironically so depressed over it, because all we wanted was a diagnosis, an answer, as to why Clay was in so much pain. The same day that we found out the results one of my co-workers suggested a chiropractor in Rexburg. She said, "He just can figure out some really crazy stuff- you should check him out".

Clay went to the chiropractor and didn't even tell him any history except, "my joints hurt". After running some muscle tests and things on him, he said, "Have you heard of Lyme Disease?". Clay couldn't believe it! This guy was telling him he had Lyme disease. We later learned that the reason the blood test came back negative was because Clay was on medications that create false negatives when tested.

Clay was treated with homeopathics for probably about 6 months or so and felt so much better. We had so much hope, as he hadn't felt that good in years. However...the improvement halted and seemed to go no where after a while. We gave up on that and thought, at least he's better.

Well, after a couple years, Clay felt horrible again. We had talked to a number of people about his situation and after a few years, someone called and mentioned a doctor in seattle who specializes in Lyme Disease. We brushed it off but after a year of trying to get pregnant, of Clay being in pain, and finally feeling like we can financially look into this, we made an appointment.

Thank goodness we did! We quickly found out that both Clay and I have Lyme disease. Yes, I got it from him. We were both tested and found positive for Lyme and another co-infection (bartonella). We've been treated for about a year now, and both have seen amazing improvements. We still have a ways to go, but we are trying desperately to get our health back. A few questions we get often are, what are our symptoms? Clay's MAIN symptom is joint pain. He is also very tired and his immune system is in really bad shape. It's gotten a lot better in the past year, but when we went to seattle for the first time we realized that his immune system was that of an AIDS patient. My main symptom has been fatigue and occasional joint pain. Both have improved for me as well. Our treatment is basically long term antibiotics (rotated every few months so that we don't become immune to them) and about a bazillion supplements. We also try to avoid gluten and sugar.

If you want to learn more about Lyme, please watch Under Our Skin, a documentary. It's on netflix instant play if you have that! Also, please feel free to ask me any questions. Lyme Disease is one of the hardest trials we've ever faced- but we are trying to keep strong and get through it!

A note to those struggling with Lyme:

KEEP GOING! So many times Clay and I wanted to give up. So many times we felt like we wanted to die because the meds hurt so bad. But by some miracle, we kept going and I can confidently tell you, we are on the home stretch, and feeling so good! I always tell people, there came a switch where I realized how sick I was...because finally I realized what GOOD felt like. I had forgotten what healthy was supposed to feel like, and once I got better, it was amazing. Here are the things that I believe contribute most to getting better quickly:

  • STAY ON MEDS- if they are giving you a hard time, call your doctor immediately and they will adjust it for you. We put up with so much unnecessary hurt. Your doctor will adjust the meds for you because they want you to stay on them! If you are hurting so bad you stop taking them, you need to call the doc RIGHT away.
  • Stay off gluten and sugar, and don't worry about anything else. So many people suggest no dairy, no corn, no meat, no anything basically. When you are sick, and weak, its hard enough to make something that's normal, let alone free of anything. I have studied and been told that the most important things to avoid are gluten and sugar. Therefore, I chose to be super strict with those and not worry about anything else. 
  • Exercise. I remember someone telling me this early on and I thought, "are you kidding me?". But as soon as you think you are close to being able to exercise, START. The major turning point for me was when I forced myself to start exercising. It makes all the difference. 
  • Rest. Rest as much as you need and can. 
  • Don't feel guilty for not doing everything. Remember, your body is fighting a SMART, AGGRESSIVE disease. It's working hard, so give yourself some slack if all you can do for the day is take your pills, and eat.
I just wanted to share that list because so many times I needed someone to tell me something like that and there are SO MUCH MORE stories online about people feeling sick, than feeling better. Doing those things helped BOTH my husband and I to get better. We are still in treatment, but I promise you, the change from last year to right now is tremendous. Keep going. You'll make it.

Sunday, January 1, 2006

Chair Reupholstering

Alright, so...some of you have said things like, "wow, I am so impressed"..." or "I want to do that, I just don't know how"....about my chair.

So, I already told you I took pictures along the way, I just never posted them. Now is the time- to unveil the secret....it really isn't as hard as it looks! I'm serious! As long as you have the right tools, which would be: a)flat head screw driver; b)staple gun; c)fabric; d)a desire to have an awesome looking chair in your living room.

Welp, let's get started!

First thing we did, was take out ALL of the decorative tacs. We did this with flat head screw drivers, like so:
If you look at the bottom left picture, of the collage above, you'll see us taking out nails...this was HARD and REALLY annoying. In all the spots they didn't have decorative tacs, which was basically the majority of the chair...were NAILS! We could've just taken hold of the fabric, and pulled...but then the fabric would rip...and we wanted to use the fabric for a pattern.

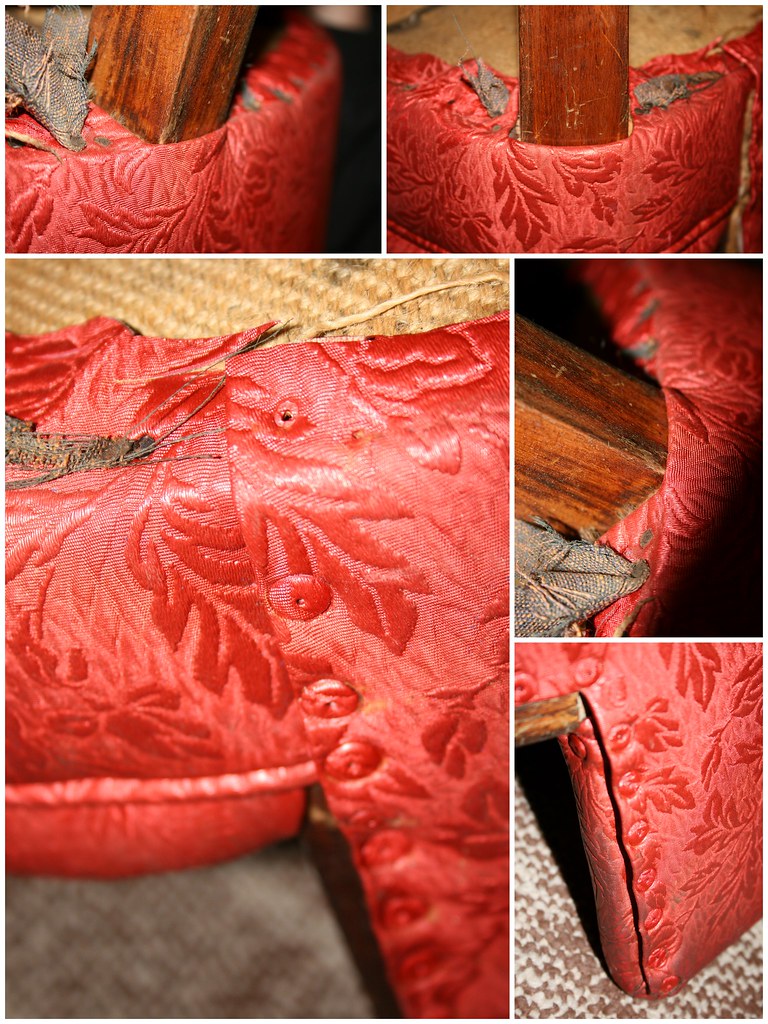
We paid VERY special attention to the detailed spots so we wouldn't forget how to put it back together. Like the following spots:
Certain spots like the legs...were done certain ways...like, folded under in one spot, tucked in another...you know. So we had to take note to make sure we did it the same way.

So after we took out all of the tacs and nails (this seriously took at LEAST 3 hours...and that is with Lori- so if I did it by myself it'd probably be like 8 hours. Yes, I know that's MORE than double the time...but she is pretty speedy) the chair looked like this:
K- I kid you not- the inside of this chair was NASTY! It had food and toothpicks and coins CAKED on. So gross. So of course, the next step was to vaccuum out all that disgustingness.

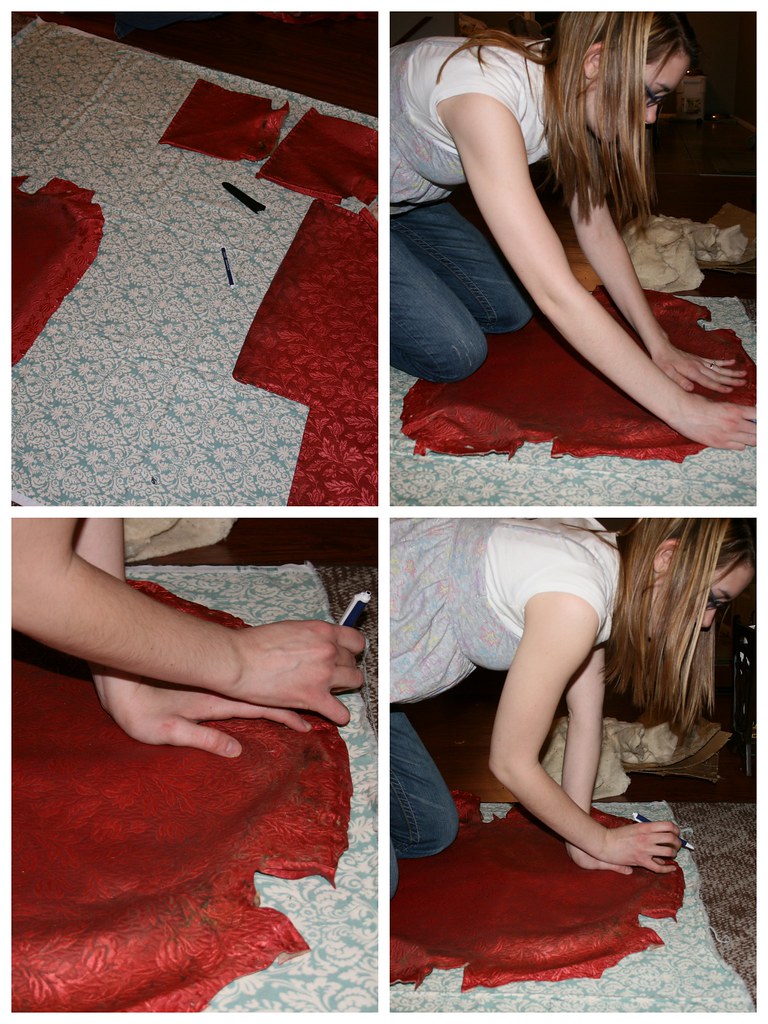
Next, I didn't take pictures of this part (should have!), but we unpicked the piece where your back rests, so that we could get a real dimension of what those pieces are before the piping is sewn in. Then we laid out all the pieces we carefully took off, onto my beautiful fabric.
We honestly traced the pieces with a pen. I wish I had a permanent marker, but I didn't- otherwise I would've done that. It doesn't matter because all the edges are tucked in the chair- so who cares if you see markings? Not I!
Then we carefully cut out the pieces...and I sewed my piping. If you don't know how to do piping- it's super simple. Google it or something. I will do a tutorial later on that maybe when I do my second chair.

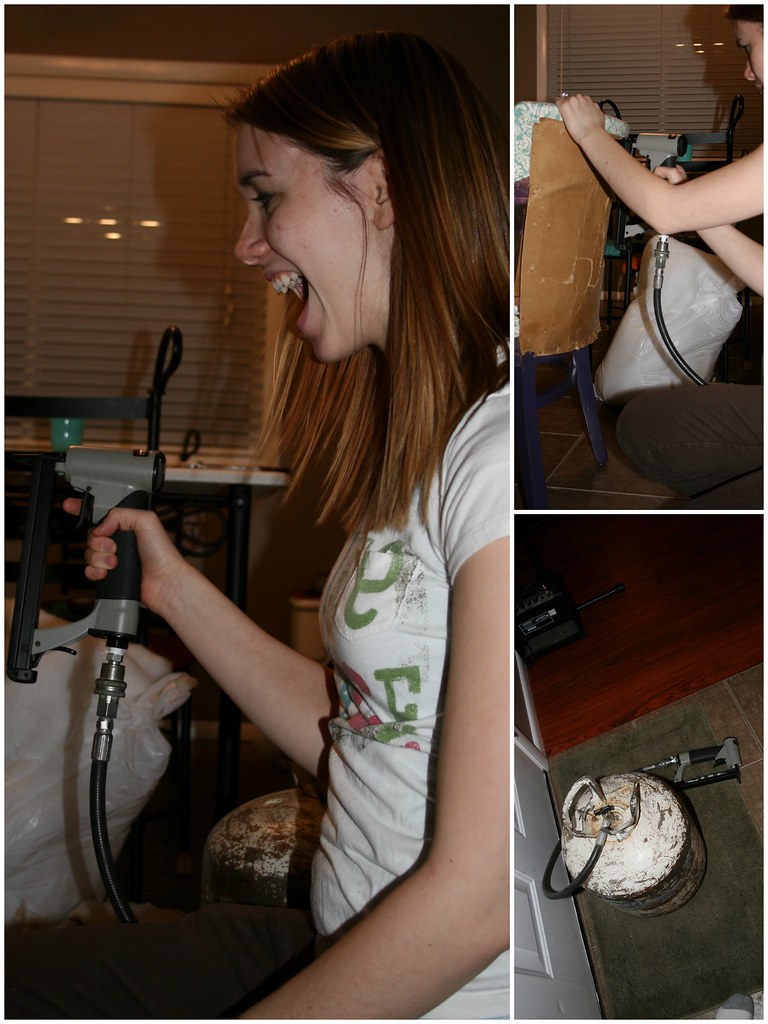
Then...we used a friggin SAWEET staple gun that Patty & Paul lent us, which is powered by air...and it was P-O-W-E-R-F-U-L! The boys (Kurt & Clay) kept saying, "Don't hurt each other", "Be Careful", "blah balhbalhlahblah". We did just fine:) Anyway, we basically put it back together like so: the LAST piece we took of the chair, was the FIRST to go back on. The FIRST piece we took of the chair, was the LAST to go on. You see? You just go backwards.

So, after we did all the stapling, it was time to put on the pieces that were held together by the decorative tacs. I didn't take pictures of this...but a tip we have is, use the same holes they came out of! Makes it so much easier. Lori pretty much did this entire job on the chair, and she found that if she pulled the fabric back, poked around the wood and found the hole, it was way easier to put through the fabric and into the chair. A few times we couldn't find a hole, so we had to nail it in- which was HARD TO DO! But, we managed.

A few things that weren't in the step by step, that I would suggest:

  • Use the batting that the chair already has
  • Fabreeze the inside of the chair if you are using that batting- I did, and could no longer smell anything:) Gross you out?
  • Use a friend- it makes it way more fun, and way easier, AND way faster
  • I spray painted the legs and arms....purple. I did this after all the old fabric was taken off, and before the new was on. I didn't even remove the batting...it didn't matter if it got some spray paint on. If you don't like the look of bright colored wood, or painted wood, re-stain it!
  • Reuse the decorative tacs. Why go spend a bum-load of money when you have perfectly good tacs from the old chair?
And with that, you'll have this gorgeous chair!
After you reupholster something, you will think of all sorts of things you want to reupholster. You will love it. DO IT!

Draw String Back-Pack


I lined the inside, and used flat-fell seams for the entire thing. That way when you look on the outside it looks nice, and you look on the inside, and it looks nice too! Perfect.

So. Here are the easy peasy steps.

1. Decide the size you want your bag. I think I did about 14 1/4 in wide...which will make it about 13 inches for the finished product . Line the selvage up with one line, and the fold with another, and then cut the width.

2. If you are adding any ribbons, buttons, trims, ruffles, etc- NOW IS THE TIME! You want to do it before you sew the lining and the outside fabric together, so that you can't see any of the seams on the inside.


3. Put wrong sides together, and then wrong sides together...again. Make sense? You want to pin it so that it looks exactly like the bag will look when it's finished.

(see how I put wrong sides together, then folded the fabric in half- how it will be when finished)

4. Sew a 5/8 " seam on one side.

5. Press both seam allowances to one side.

6. Trim lower seam allowance to about 1/8 in.

7. Press top seam allowance so that it folds around bottom seam allowance that was just cut. You may want to pin after this step. I didn't, but if you've never done this before it might make it easier when sewing.

8. Sew close to the edge of the fold. And press once finished. ***Sidenote- I didn't do this but quickly realized I should've....when you do this, make the straps before this step and insert the ends of your straps inside the seams to the bottom of the bag. This would make a way more clean and professional look. I was planning on doing this, but forgot!
This is what it should look like after you've sewn.

9. Make straps. I just cut long pieces of fabric about 2 inches thick or so. Once you cut them, press them so edges meet in the middle.

Press again in half.

Sew close to the edge.

10. Make a button hole in the top part of your bag- about 3/4 in from top. See your sewing machine manual for instructions on this. Each machine is a little different I think.

11. Fold fabric over twice and press, so that the button hole is folded in half at the top of the bag.

12. Sew close to the edge all the way around top of bag.

13. Take a safety pin, and attach it to your strap.

This part was SO FRUSTRATING! You basically have to wrap the strap all the way around so that it comes out where it started. You want to make it so that when you pull on all strings, it scrunches together at the top.


14. Then, if you're foolish (like me) and forget to attatch the straps when sewing the sides together, just fold over ends twice and stitch back and forth in two spots. It isn't the prettiest, but not the tackiest either:)
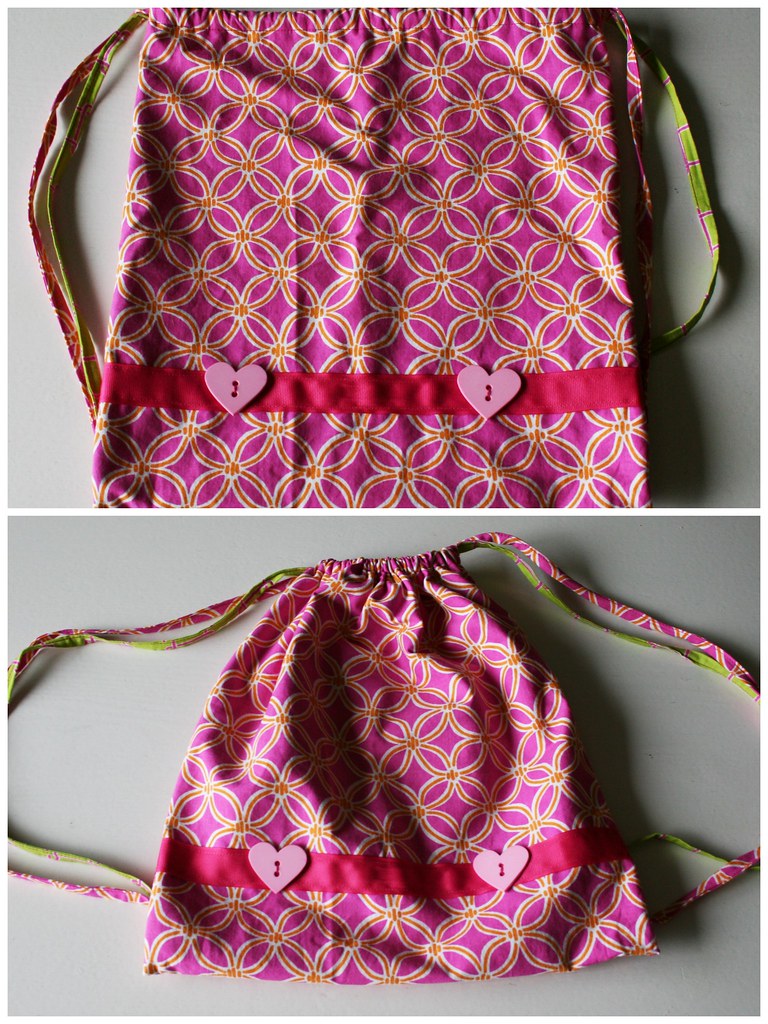
And voila!
A cute lil backpack for any five year old. Change up the colors and trims and you could definitely do this for a boy...I'm kinda thinking of doing one for myself actually:)