Wednesday, April 28, 2010

Ruffle-Pillow Tutorial


Alright folks. Here we go.

1. Cut strips. Cut fabric into 1-2 inch thick strips. We did 1 3/4" thick on this pillow. Because this was a full size pillow, we used the entire width of the fabric for our length of strips. So if the fabric was 45", than the strips were 45" X 1 3/4". A good rule of thumb is to allow double the length of your pillow for your strips. Fold the fabric in half, or even in half twice, and the cutting will go a lot smoother. Also- if you don't have a rotary cutter and are doing this project, I promise it will be worth the money to go get one. I can't IMAGINE doing this with scissors.

Do this until you have like...a bajillion strips.

2. Surge Edges. We surged the edges for a cleaner look- using a narrow rolled hem. It makes it very quick if you do chain sewing...where you basically do one side of all the strips and connect each strip so you don't have to stop and start and waste a bunch of thread. Just cut each of them apart at the ends once your done!

If you don't have a surger, I've seen pillows like this with a frayed look- and since it's just a decorative pillow, it won't matter if it frays since it won't see much movement. If you are really worried, you could just sew a seam 1/8-1/4 in away from edge on each side. I don't think it will be that noticable if the thread is the same color- because of all the ruffles.

3. Ruffle. Set your sewing machine tension to basically the highest tension possible (write down the tension it's normally at so that you don't forget when going back to normal sewing).
Set your stitch length to the highest number.

Doing this makes it so that your fabric starts to ruffle on it's own. Not entirely, but it makes the scrunching process a lot quicker.

Sew down the center of each strip. It doesn't have to be PERFECT, cause no one will notice. Trust me!
See how it starts to ruffle?

After you've done this, you need to adjust, ruffle, adjust. How you adjust and ruffle more, is by taking a thread and pulling while holding onto your fabric with the other hand. Scrunch it up and really just adjust it with your hands to the ruffle consistency that you like. Some people like a tighter ruffle, some like a looser ruffle. It's really up to you at this point.
You'll want to place them on your fabric for the pillowcase so that you can visualize how it looks on the pillow.
Pin strips on front piece of pillowcase.
Sew strips down the middle of each strip onto pillowcase piece of fabric. You'll want to sew down the entire length of each strip. Remember to put your tension and stitch length back to normal for this.

Sew in zipper now if you are planning on doing so. You could easily do other closures, or simply sew around entire thing, leave a gap to turn inside out, stick pillow inside, and then sew the gap shut. Whatever you wish. This pillow was done with an invisible zipper.

Then pin around the rest of the pillowcase and sew it together!
And there ya have it!


The ruffle pillow!

These pictures were taken when we were making my friend Lori's pillows. They are the same size as my pin-tucked pillows. Turned out AWESOME! She was super smart and just bought cheap pillowcases from walmart I think, and unpicked the sewing, added ruffles and zipper, and sewed it all back together! Worked perfectly.


Saturday, April 24, 2010

Avatar Kebab Night

So we never saw Avatar in the theaters...but kept hearing EVERY person who saw it say how amazing it was. Seriously? I didn't hear from ONE single person that they didn't like it. Clay already decided when he saw the preview that he wanted to buy it. So we did! We bought it the day it came out on BLURAY! We've never bought a bluray movie before but we have a PS3 which is a bluray player along with a video game console...so ANYway. We invited our friends over, I made chicken kebabs, and fruit kebabs (strawberries, grapes, pineapple...YUM!) and watched Avatar! It was great fun. Pretty much, Avatar is my new favorite movie. I LOVED IT! Things I liked about it:

1. It was GORGEOUS! It was simply a beautiful movie.
2. The sound was amazing- but we do have a nice sound system and it was bluray...so that will effect it.
3. The messages were amazing. I LOVED the message that everyone and everything is connected. We all share an energy and are all part of this life for a reason, and basically the whole point of life is to connect, stop, and feel. Ah, wonderful.
4. The characters were just awesome.
5. If you look into how it was made, it makes it that much better. Even though so much of it was not real- you feel like it is. Like, I had a dream last night that I was at Pandora, in my Avatar...and it was lovely. It was so real looking, even though none of it exists. And the writer and artists are soooooooooooooo freaking creative. I love it.

Overall, if you haven't seen this movie- SEE IT! It's the bomb-diggity. Yep, I said it. Bomb-diggity. No doubt:)

I went to an upholstery class today (free of charge, thank goodness) with Lori, Patty, and Patty's sister Cheryl- and Lori and I basically decided we could teach that class...BETTER than it was being taught. We were glad however, that we went. Cause we did learn some stuff about different tools and supplies you could use to make things easier. So that's cool.

Friday, April 16, 2010

Pin-tucked pillow

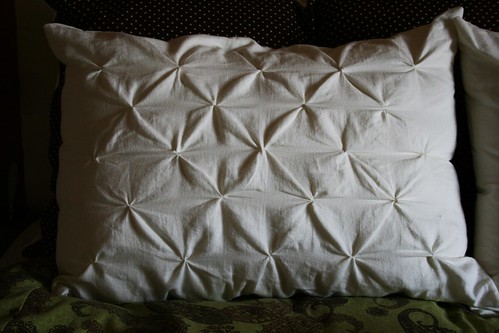
Do you want to know how to make a pin-tucked pillow case? Just like these ones?

Well, here's how:

1. Fold fabric and make sure the selvage is lined up properly. See how the part that the fabric store cut is way off on mine? Yes. This happens. You need to line it up so that your fabric isn't all bunched or pulling to one side. It needs to be naturally flat. Which will cause your cut edge to probably be off.

2. Next, if your fabric is like mine, and you have a medium sized cutting board, like me, then you should probably just fold up your fabric again, and line up your fold with the selvage PERFECTLY. This just makes it a lot easier to cut!

3. Now you want to straighten that edge. The best way I've found to do this is to line up the top selvage part on a line, and the bottom fold on a line, and then line up your ruler with each of those lines...and cut!

4. If you don't know the exact size of your pillow, do what I did. Put your pillow on the cutting board and flatten it until the entire top or bottom seam is flat. Do the same with the sides, and you have your dimensions!

5. Next, cut the other side so that you have the right width.

6. This part I didn't document well, but you'll want to unfold your fabric and fold it the other way, so that you can cut your height of the pillow.

Now you have two sides to the pillow! Perfecta!

7. Now...I don't have very good lighting here- so click on the photo for a better closeup. I marked the fabric and measured precisely where I wanted my tucks. I did something like...5 1/2 in apart...but really- you can decide what distance apart you want because I'm sure closer or farther apart would look great! Especially for different types of projects. Just make sure that the rows next to each other should not align. As in...each tuck should fall in the middle of the above and below tucks. Make sense? Scroll down to the finished product to make sense of that. You only need to do this on ONE of the pieces of fabric. It's okay if the back of the pillow is flat and boring- cause no one's gonna see it!

8. Head on over to your sewing machine and put your settings so that your stitch length is about a 1.5 or so. This way your stitches are tiny...I didn't want my tucks to come loose!

9. This is the REALLY technical part:) Take your fingers and pinch right where your dot is. Twist the fabric, and sew back and forth (forward, and back-stitch, forward, and back-stitch) a few times about 1/4 inch from point.

10. Continue doing this on all of your dots until the back of the fabric looks like this!
Notice how none of them are quite the same? This is the great thing about these pillows- they don't have to be perfect! And no one really notices. As long as they are all measured to align right- it doesn't matter if one tuck is sewn vertical when one is sewn horizontal. Ya know?

11. I used an invisible zipper for my closure which you can learn how to do on the package. It's pretty simple. After I sewed in the zipper I sewed all around the rest of the pillow and voila!

That's how ya do it! Pretty simple right? Go make some pin-tuck pillows, blankets, bags, whatever! Just a warning though- though the process is simple, it is VERY time consuming. Each step takes way longer than expected.

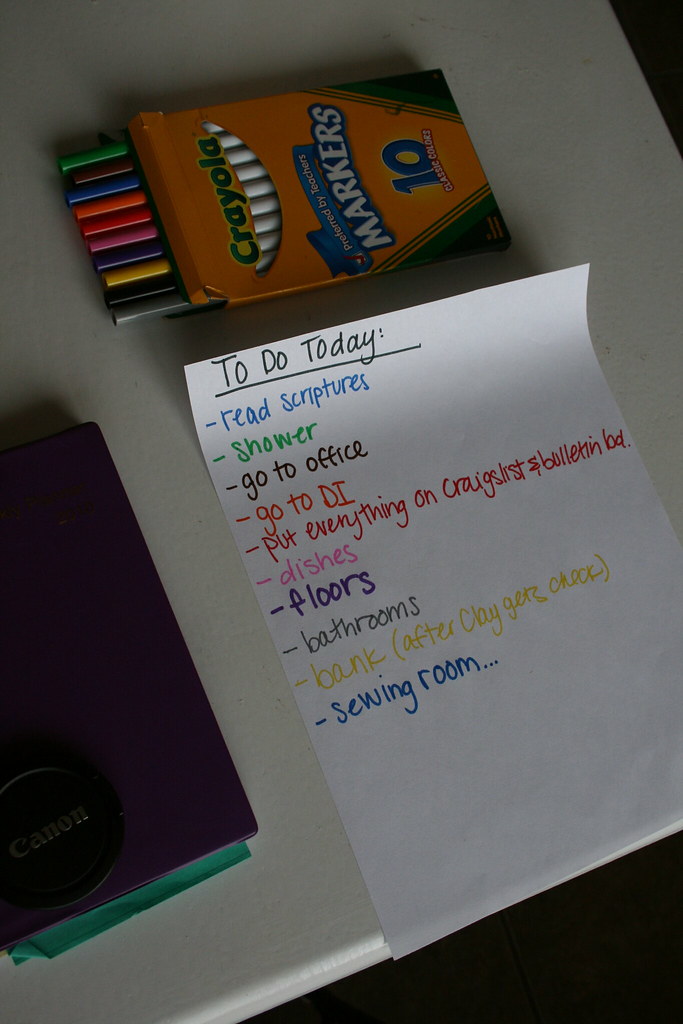
To do list...

It's not even 9:00 am yet and I've already eaten, and made my to do list. I am SET! Now lets see if it all gets done..........yikes!

It's the 16th of April. Which is pretty much a satisfying day. I feel a bowl-full of anxiety that was just dumped out the window last night. It's nice. In case you forgot, I am an accountant...tax preparer...you know. Anyway. It's nice. I got today off- but I do have to go into the office to take care of one thing. It'll only take a few minutes though- so no biggie.

Alright. Off to do my list! Peace out!

Monday, April 12, 2010

blog under construction

Hey- sooooooo the blog is undergoing construction right now:) So while you see those links up there that mostly lead to nothing...just know that I'm planning on making them lead SOMEwhere when you click on them. And I'm gonna change my header. Anywho. That's the answer to the question- "what are those for?".

Saturday, April 10, 2010

Pillow project

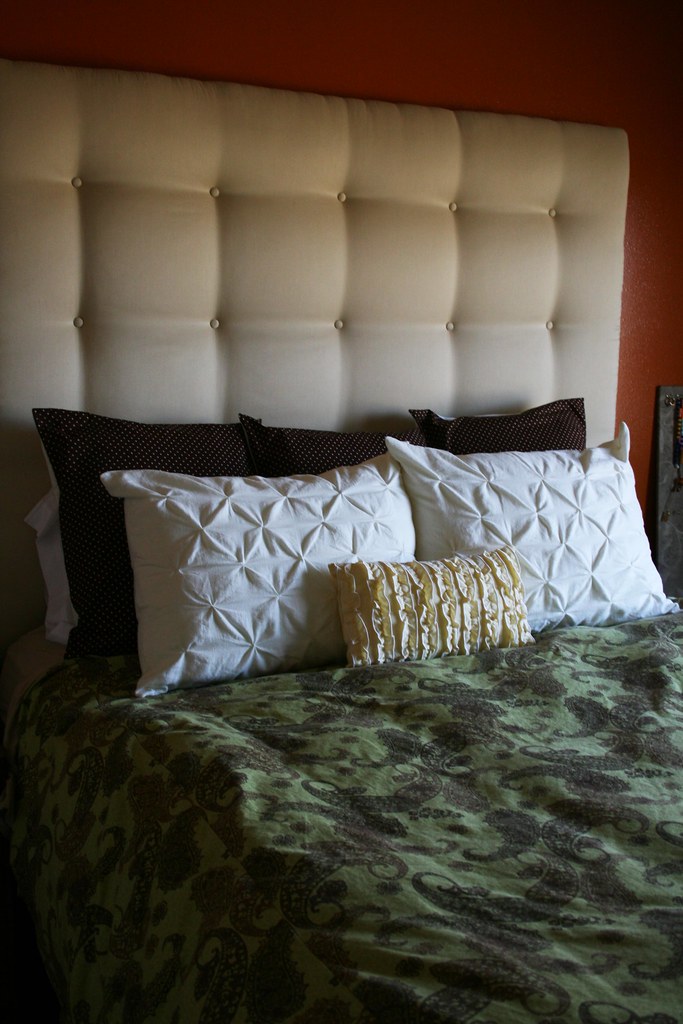
I did it! I finally finished all the pillows for my bed. I am very pleased.


I did a small rectangular ruffle pillow for the front, pucker pillows for the middle, and plain straight pillows for the back.


Next project: bedskirt. YIKES! We rise our bed up cause we like it tall, AND Dante is so tall he can like rest his head on it- even when it's raised up, and we don't want to escalate the problem by keeping it regular height. So it looks really tacky I think....and I want a bed skirt!

I've had the ruffle and pucker pillows done for a LONG time...but I knew what fabric I wanted for the back pillows, and decided to wait to use birthday money for the fabric. I'm glad I did because that fabric was 50% off! Since it was seriously 8.99 a yard (and it's only cotton), I was glad I waited. The other pillows were made out of fabric laying around my sewing room. The yellow one was made out of one of Patty's old dresses:) The pucker ones were made out of this fabric I got a long time ago to go on the back of a second duvet cover. The fabric I used for my chair was the fabric I was planning on making that duvet cover with, so now I have a ton of that backing fabric. But it's been great because I've now used it on both pucker pillows, and all the backs of the plain polka-dot pillows. I know I'll end up using it for lotsa stuff.

I really want to get some art in our bedroom too. Along with painting our dressers. I just want to make our bedroom PERFECT! I've heard my mom say before, that designers always say that people decorate their bedroom LAST because guests never see it. But that you should decorate it FIRST, because it's supposed to be the most peaceful "hideaway" place for you, and you want it be a place you WANT to go. Make sense? I completely agree. Clay is like, "What's the point of the pillows? We are barely in there, and when we are, we'll just take them off." ...............men. I told him that it makes me happy, and that's all that matters:)

Aight. Better go have my Saturday morning date with my hubby. We are watching some movie on netflix instant play- that I'm not quite sure about. But Clay claims it's GREAT! We'll see.

Oh yeah- I have pictures and stuff coming on how to make all the pillows. They are all really simple. Time consuming, but simple. Anyone who knows how to sew a straight line can do them all.

Thursday, April 8, 2010

Gracie's bag

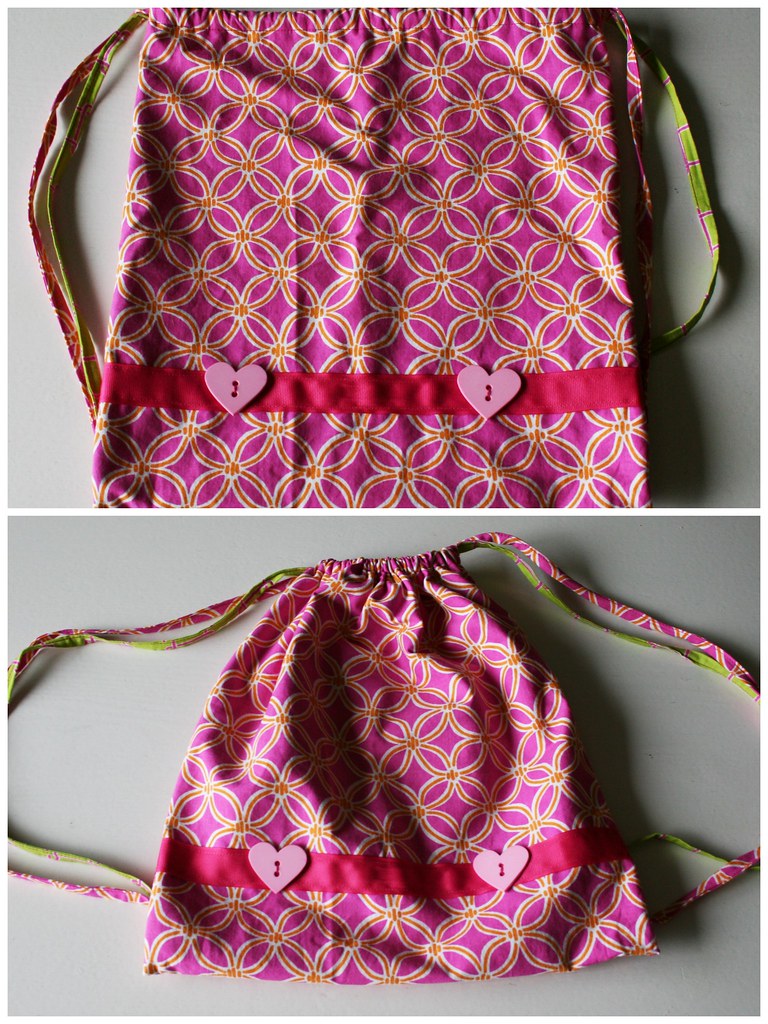
So- it was my niece's birthday a bit ago. The day after mine, to be exact. I wanted to make her something wonderful- because I really just love any excuse to make something wonderful. Especially something that would be totally fit for a 5 year old....it's not like I have tons of opportunities to make stuff for 5 year olds. So anyway....I decided to make her a draw-string backpack! I've always wanted to make one- so I was super pumped. Especially after I realized the finished product looked like this:


I lined the inside, and used flat-fell seams for the entire thing. That way when you look on the outside it looks nice, and you look on the inside, and it looks nice too! Perfect.

So. Here are the easy peasy steps.

1. Decide the size you want your bag. I think I did about 14 1/4 in wide...which will make it about 13 inches for the finished product . Line the selvage up with one line, and the fold with another, and then cut the width.

2. If you are adding any ribbons, buttons, trims, ruffles, etc- NOW IS THE TIME! You want to do it before you sew the lining and the outside fabric together, so that you can't see any of the seams on the inside.


3. Put wrong sides together, and then wrong sides together...again. Make sense? You want to pin it so that it looks exactly like the bag will look when it's finished.

(see how I put wrong sides together, then folded the fabric in half- how it will be when finished)

4. Sew a 5/8 " seam on one side.

5. Press both seam allowances to one side.

6. Trim lower seam allowance to about 1/8 in.

7. Press top seam allowance so that it folds around bottom seam allowance that was just cut. You may want to pin after this step. I didn't, but if you've never done this before it might make it easier when sewing.

8. Sew close to the edge of the fold. And press once finished. ***Sidenote- I didn't do this but quickly realized I should've....when you do this, make the straps before this step and insert the ends of your straps inside the seams to the bottom of the bag. This would make a way more clean and professional look. I was planning on doing this, but forgot!
This is what it should look like after you've sewn.

9. Make straps. I just cut long pieces of fabric about 2 inches thick or so. Once you cut them, press them so edges meet in the middle.

Press again in half.

Sew close to the edge.

10. Make a button hole in the top part of your bag- about 3/4 in from top. See your sewing machine manual for instructions on this. Each machine is a little different I think.

11. Fold fabric over twice and press, so that the button hole is folded in half at the top of the bag.

12. Sew close to the edge all the way around top of bag.

13. Take a safety pin, and attach it to your strap.

This part was SO FRUSTRATING! You basically have to wrap the strap all the way around so that it comes out where it started. You want to make it so that when you pull on all strings, it scrunches together at the top.


14. Then, if you're foolish (like me) and forget to attatch the straps when sewing the sides together, just fold over ends twice and stitch back and forth in two spots. It isn't the prettiest, but not the tackiest either:)
And voila!
A cute lil backpack for any five year old. Change up the colors and trims and you could definitely do this for a boy...I'm kinda thinking of doing one for myself actually:)

I was very pleased to hear Rebecca say that the next morning after Gracie's birthday, she got up and RIGHT away put on her new clothes, filled her backpack, put it on, and told Rebecca she was ready to ride her bike (her big birthday present). She started complaining about how heavy her backpack was...keep in mind it's just cotton....and Rebecca opened it to find a book of mormon, and a friend magazine. HA! Rebecca said she must've been feeling rather spiritual that day:)

Well, I'm off to go make the last of the pillows for my bed. Wish me luck! Hopefully by tomorrow I'll have pics up of them!!! Be excited- they are awesome!